
 21541
21541
*** If you see a message that your macOS version is incompatible with this app,
please reach out to Support for a compatible app version.
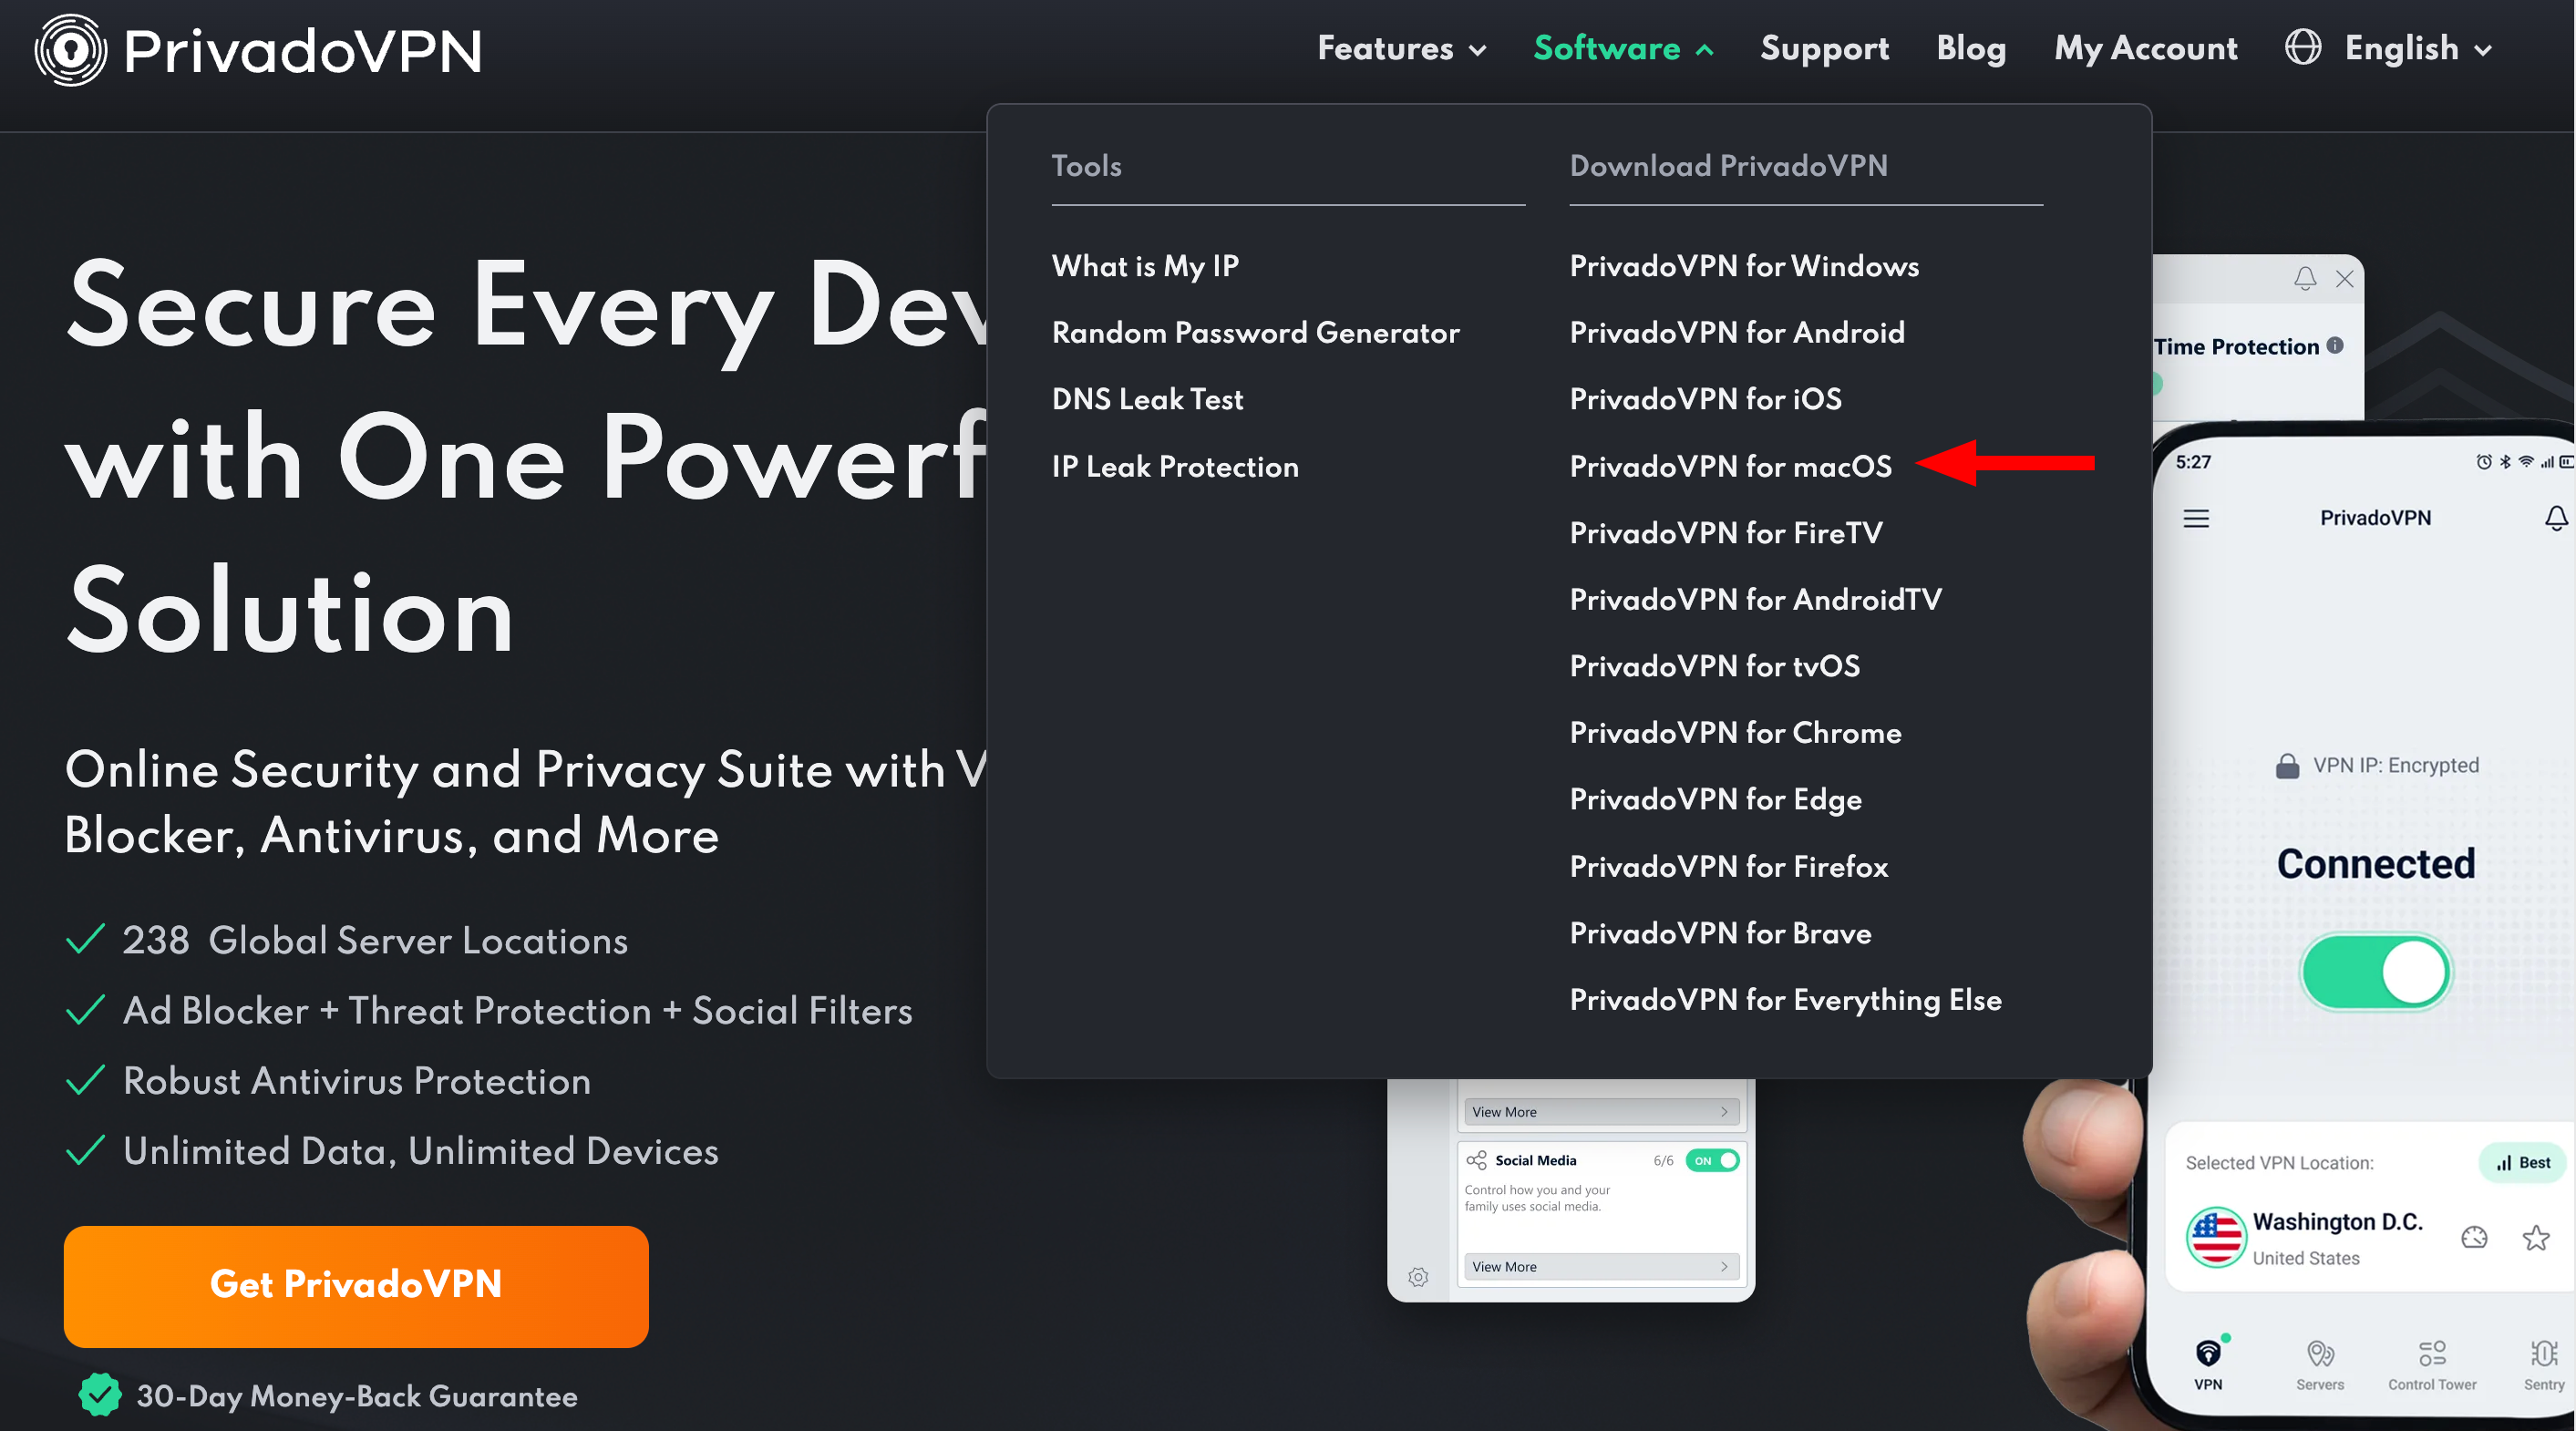
1. Go to the Privado website > Software > and click ‘PrivadoVPN for macOS’.
2. Click ‘Download PrivadoVPN for macOS’.

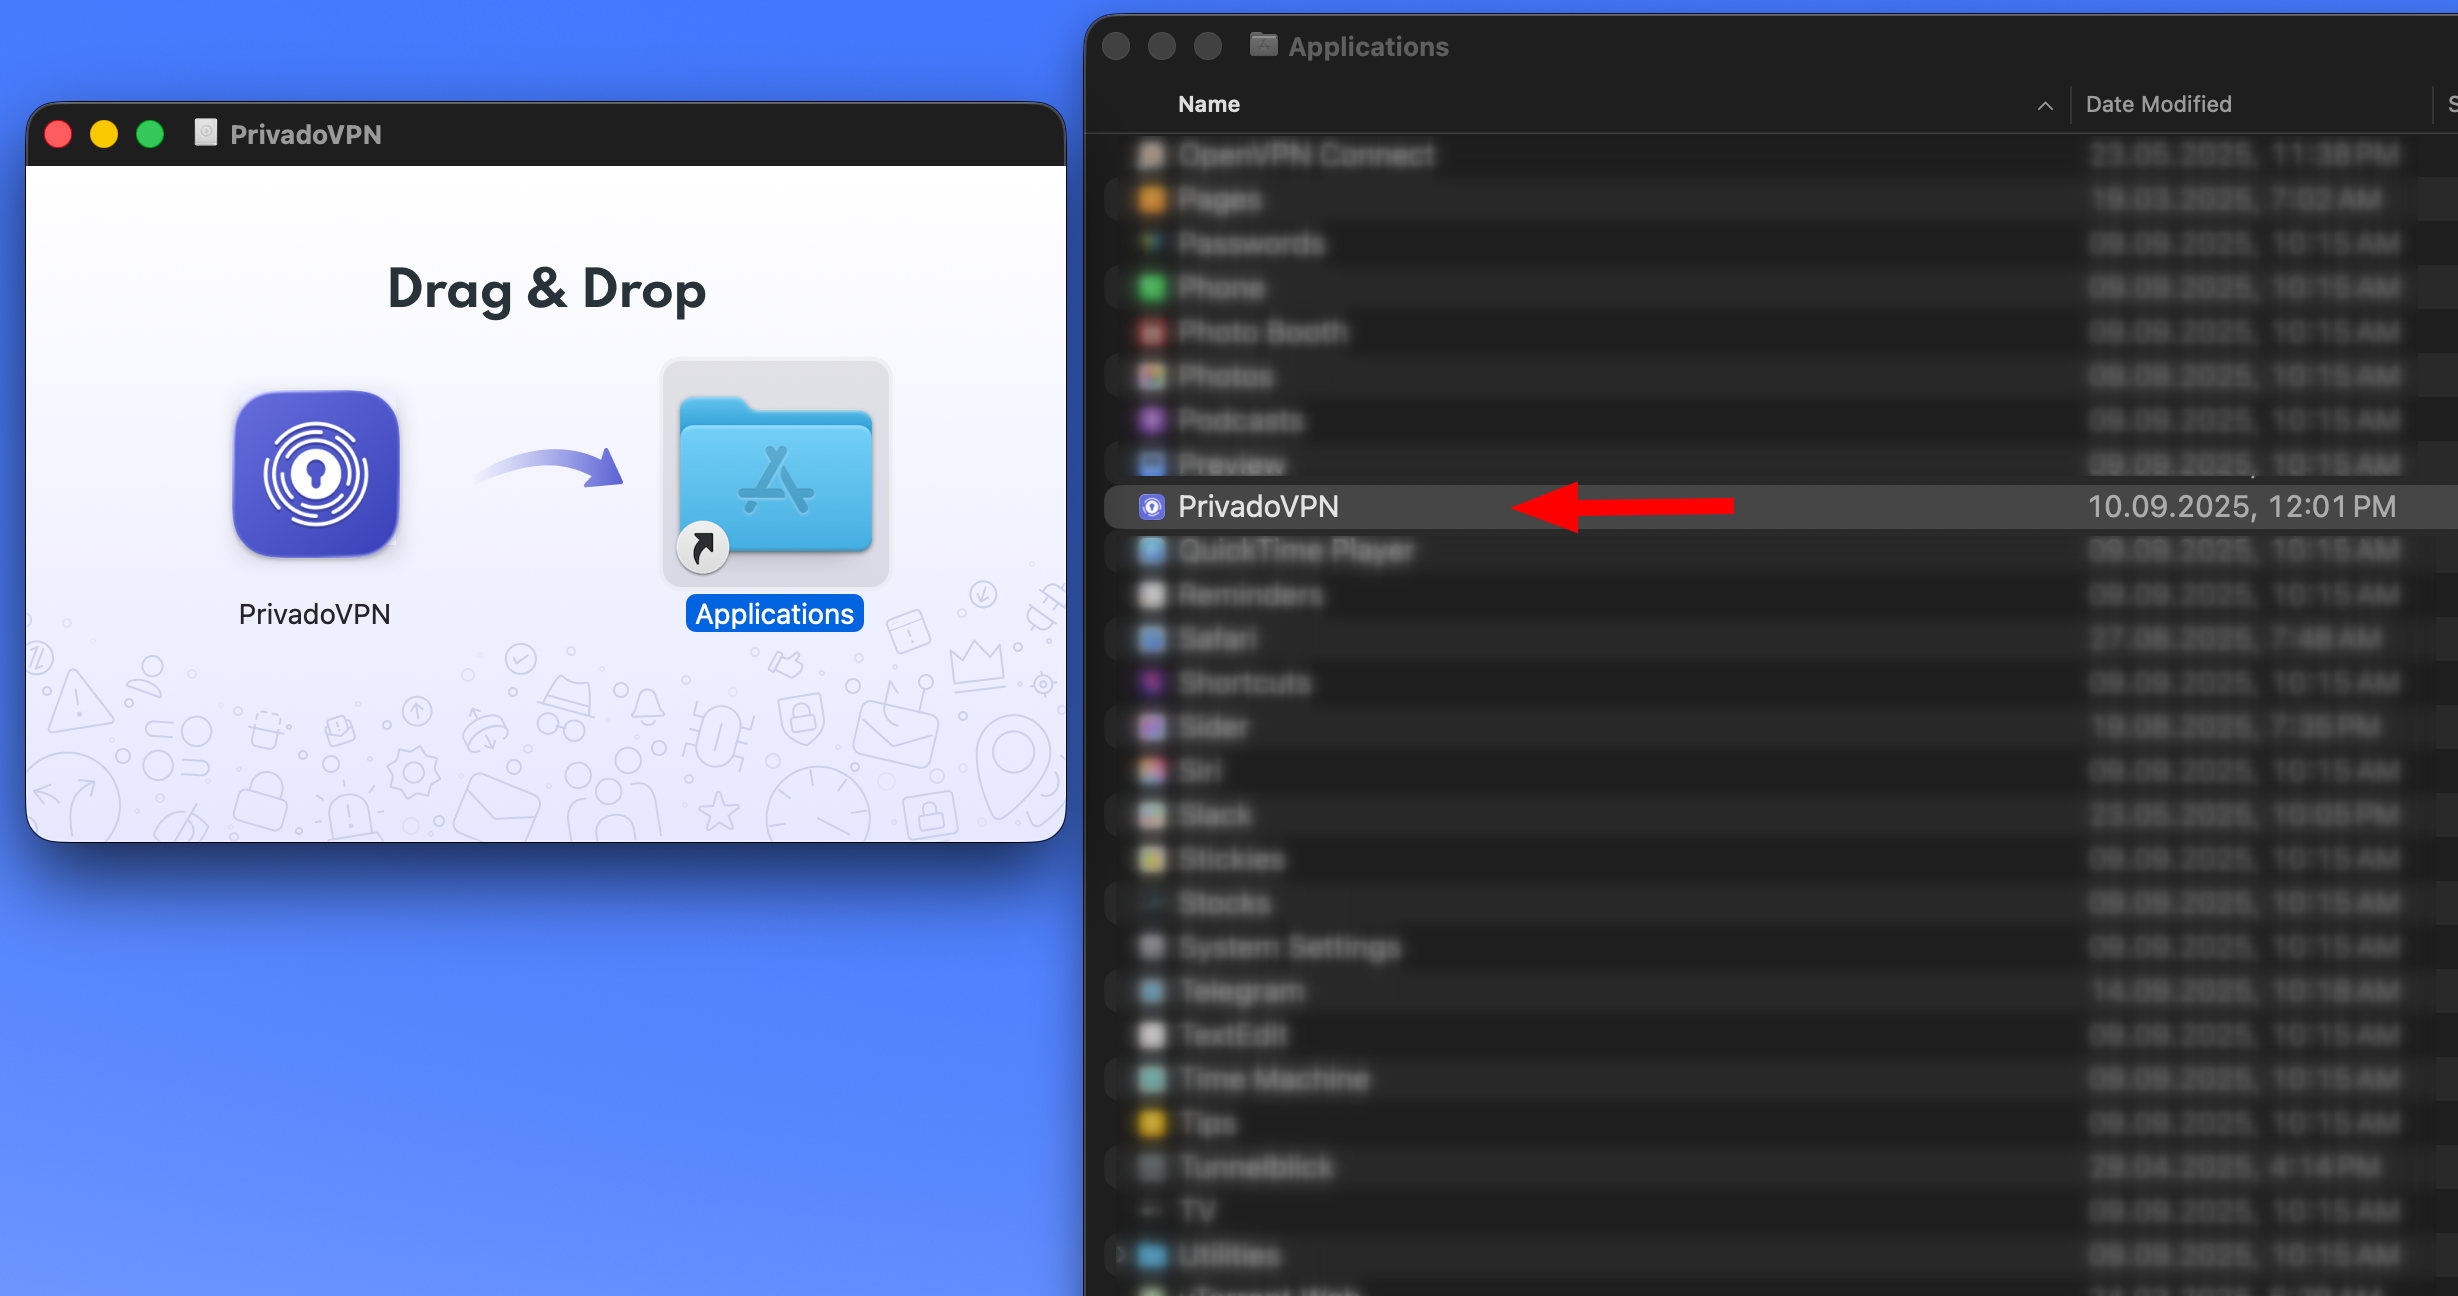
3. Double-click the downloaded app or locate it in the ‘Downloads’ folder of your browser.

4. Drag the app into the Applications folder of your Mac.
• Open the Applications folder, find PrivadoVPN, and double-click it to start the installation.
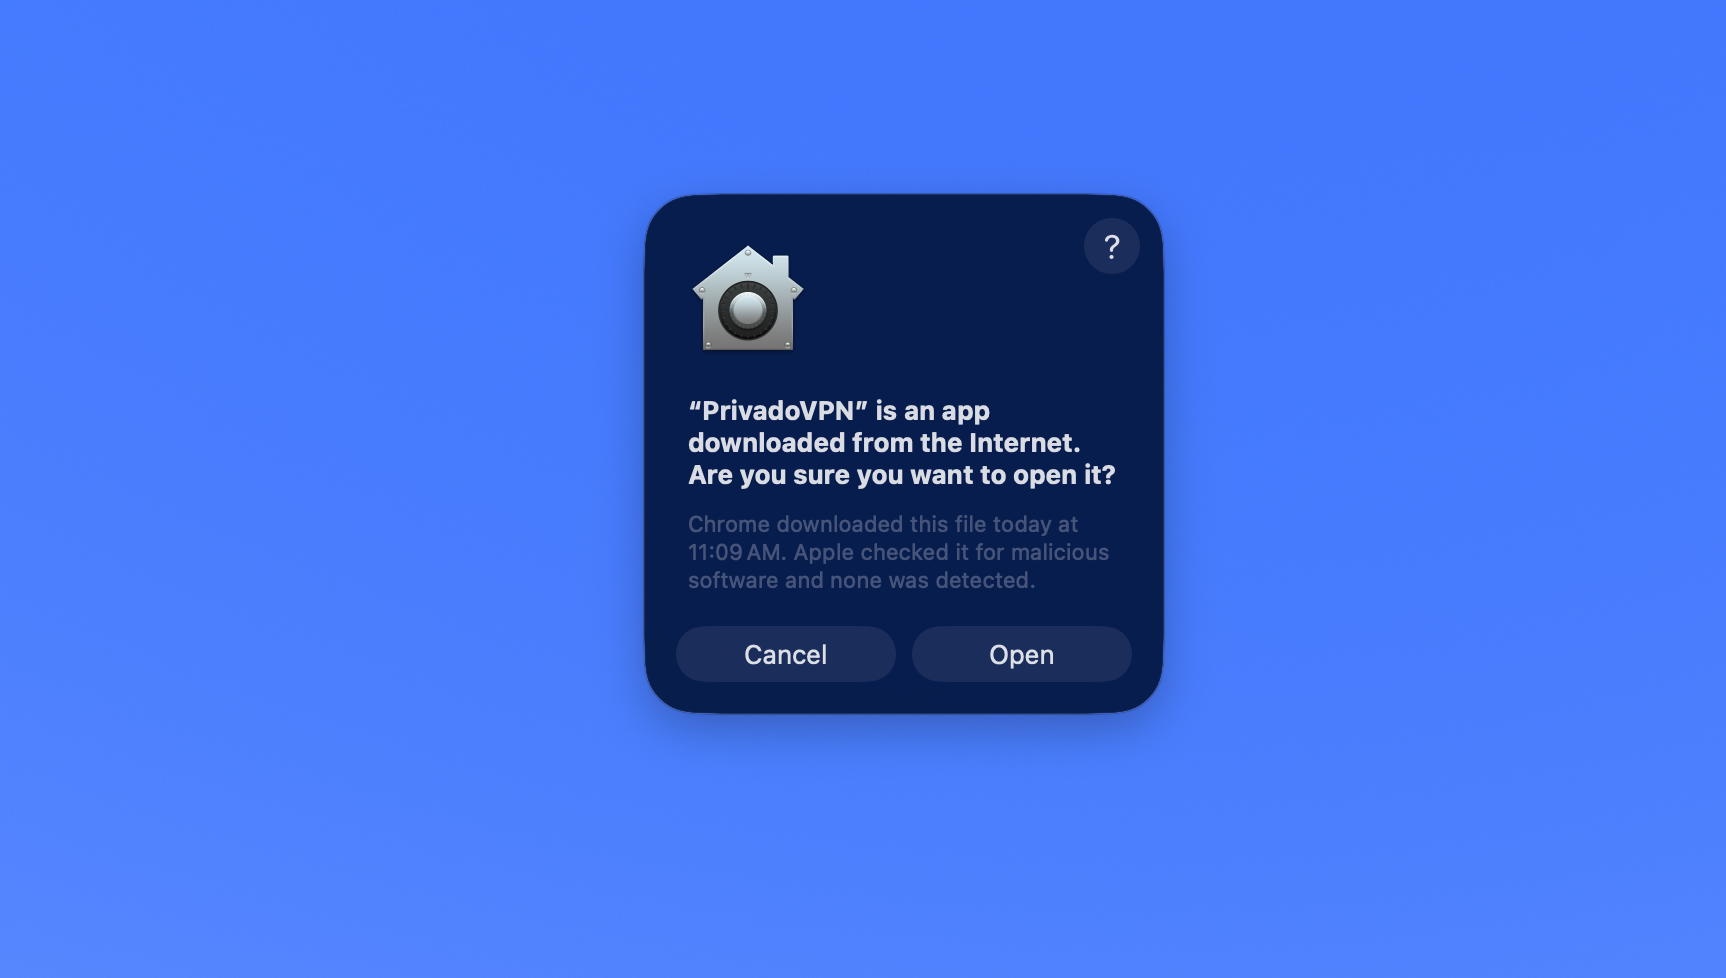
5. Click 'Open'.
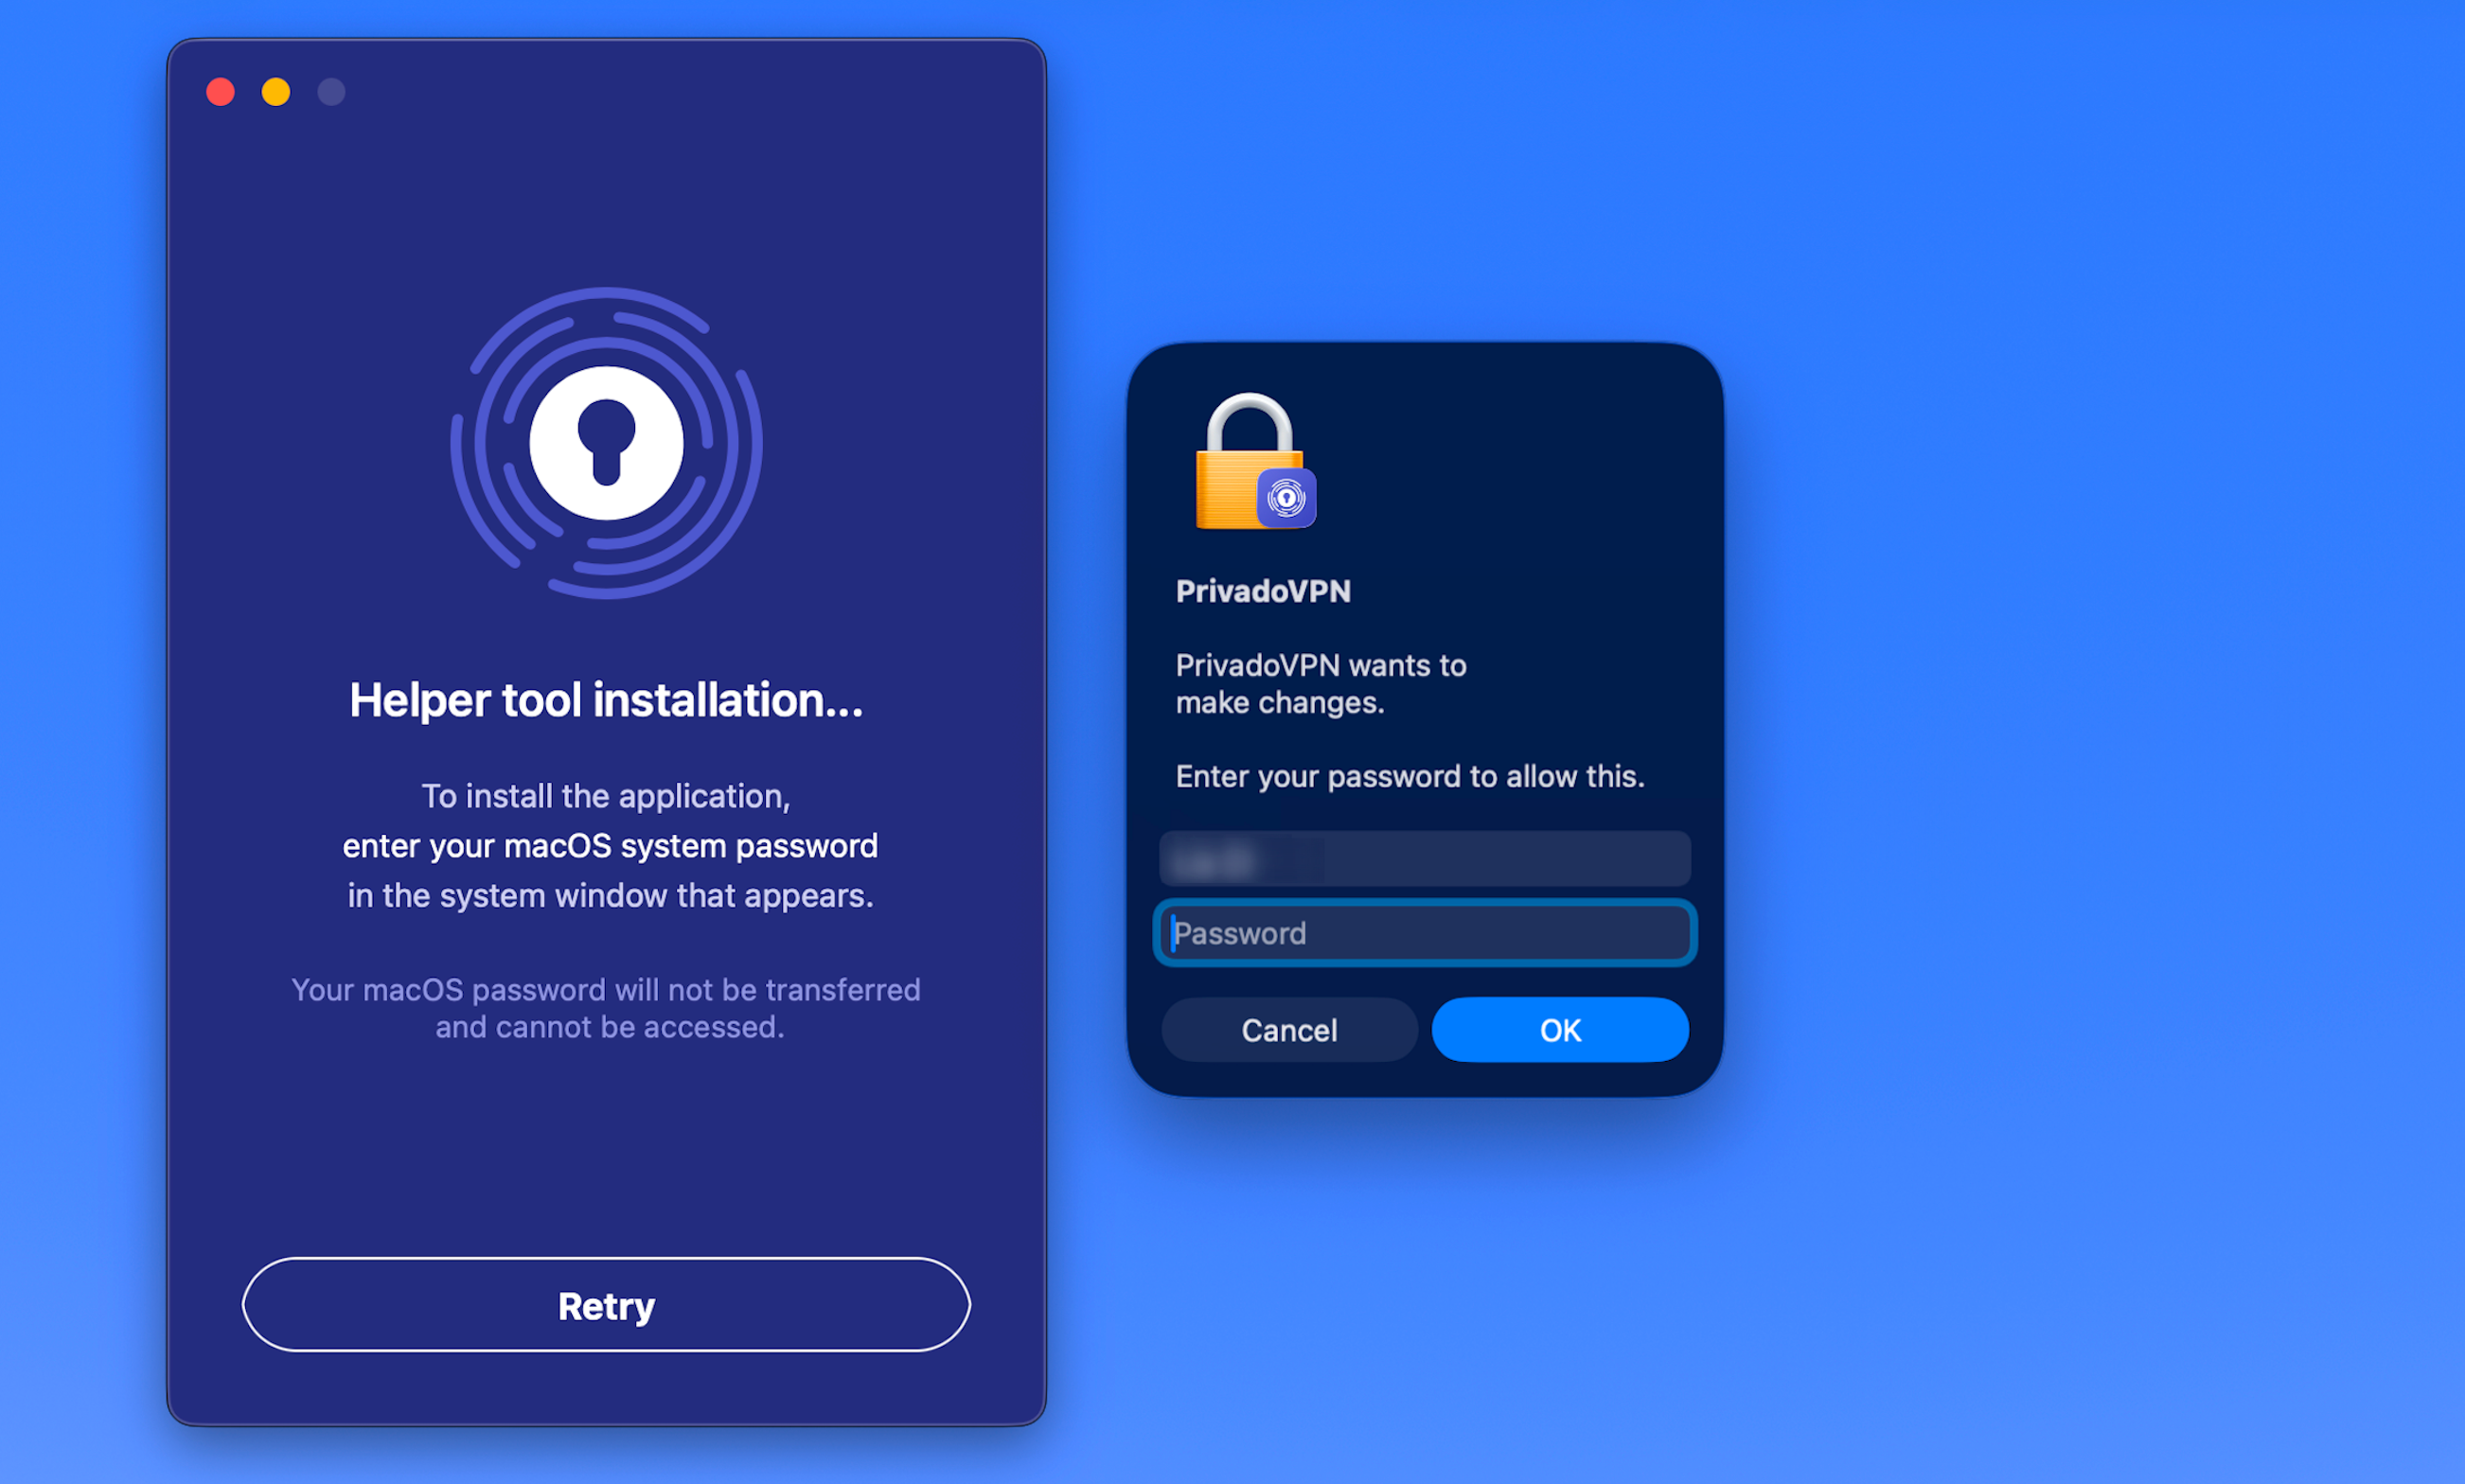
6. Enter your macOS password to allow the installation of the Privado Helper tool.
7. Log in using your Privado username (you can use your email address as username) and your password.

8. Hit the 'Click to Connect' button to connect to the 'Best available' server for your location.
• Alternatively, click the small arrow to select your preferred VPN server first and then connect.
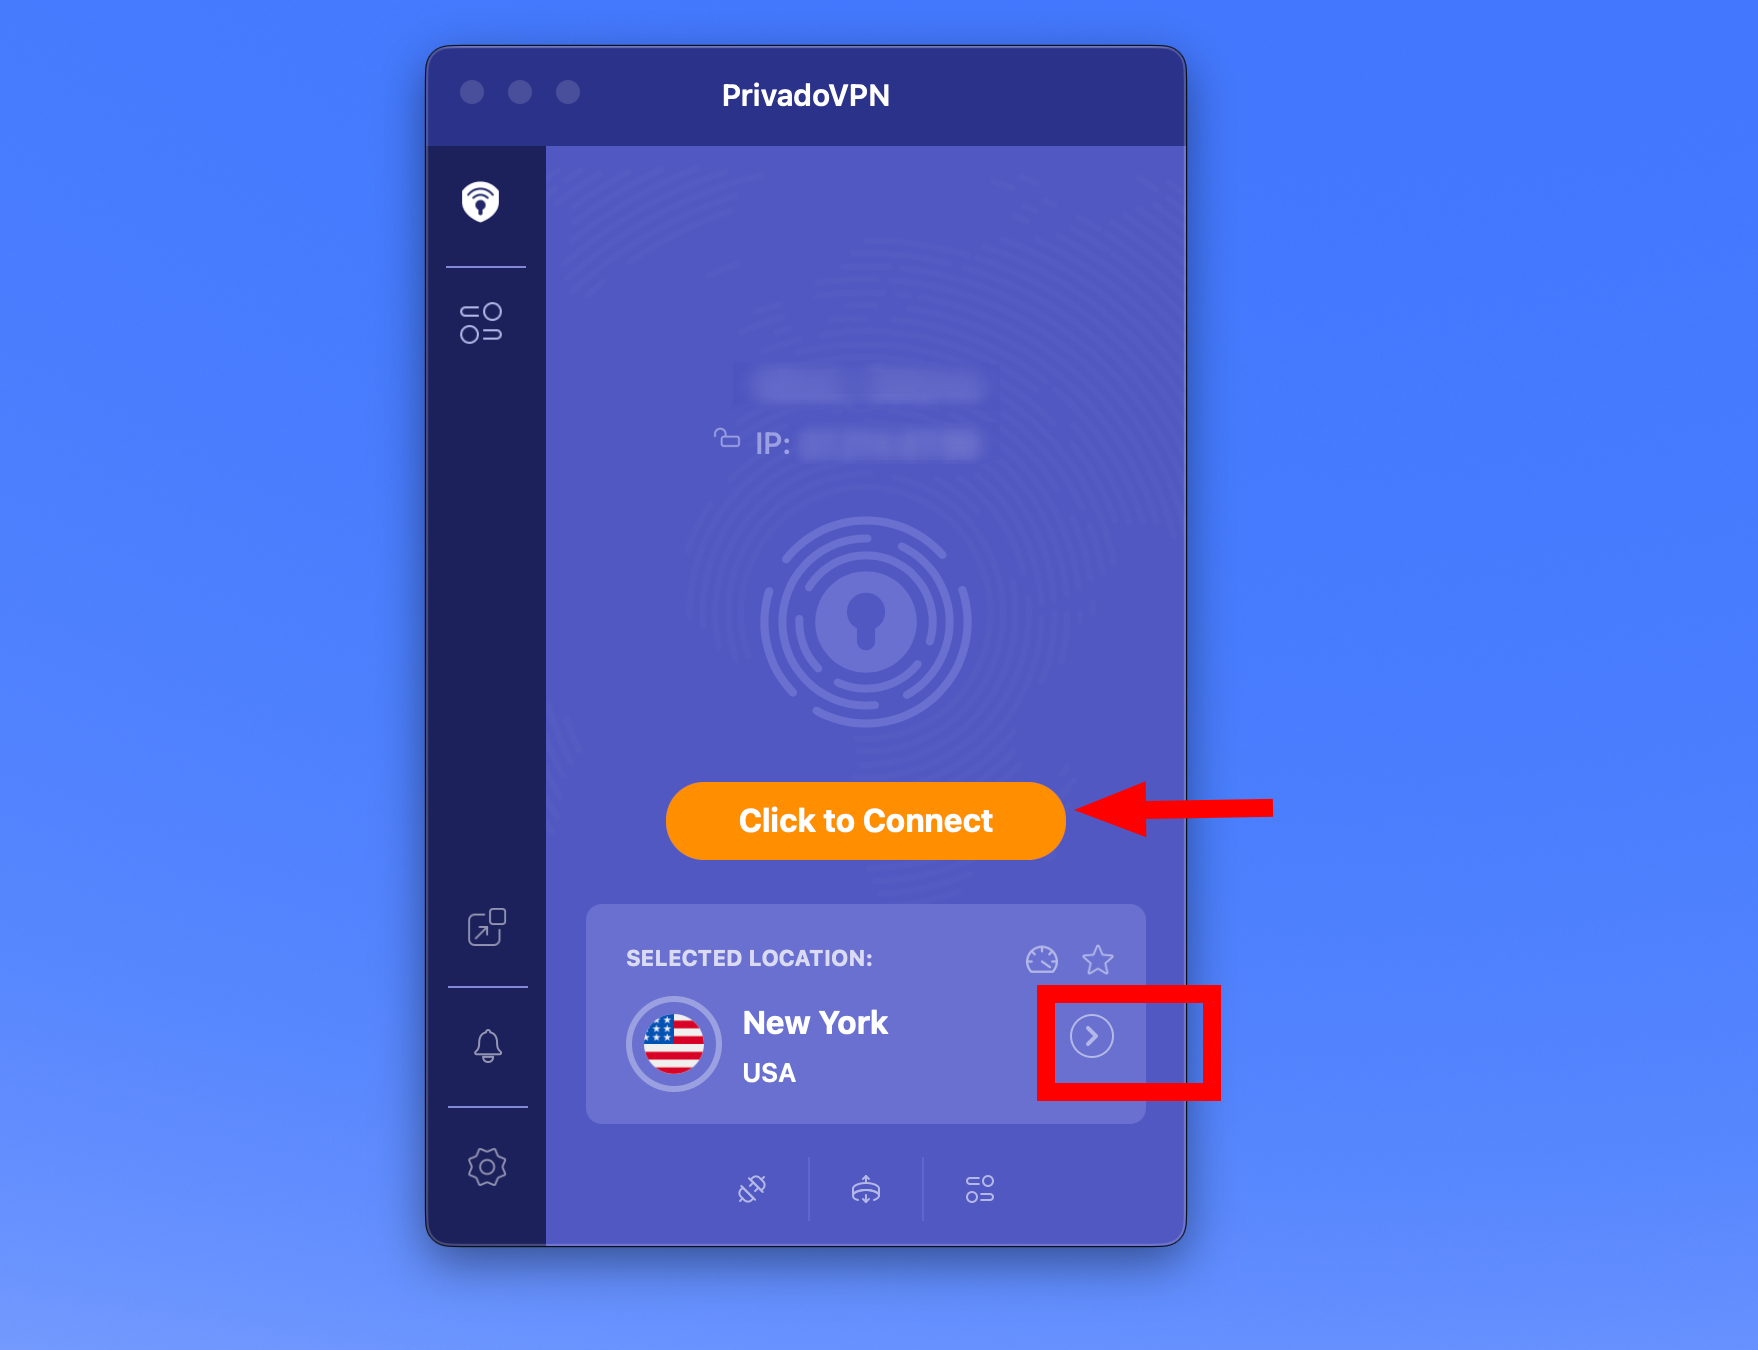
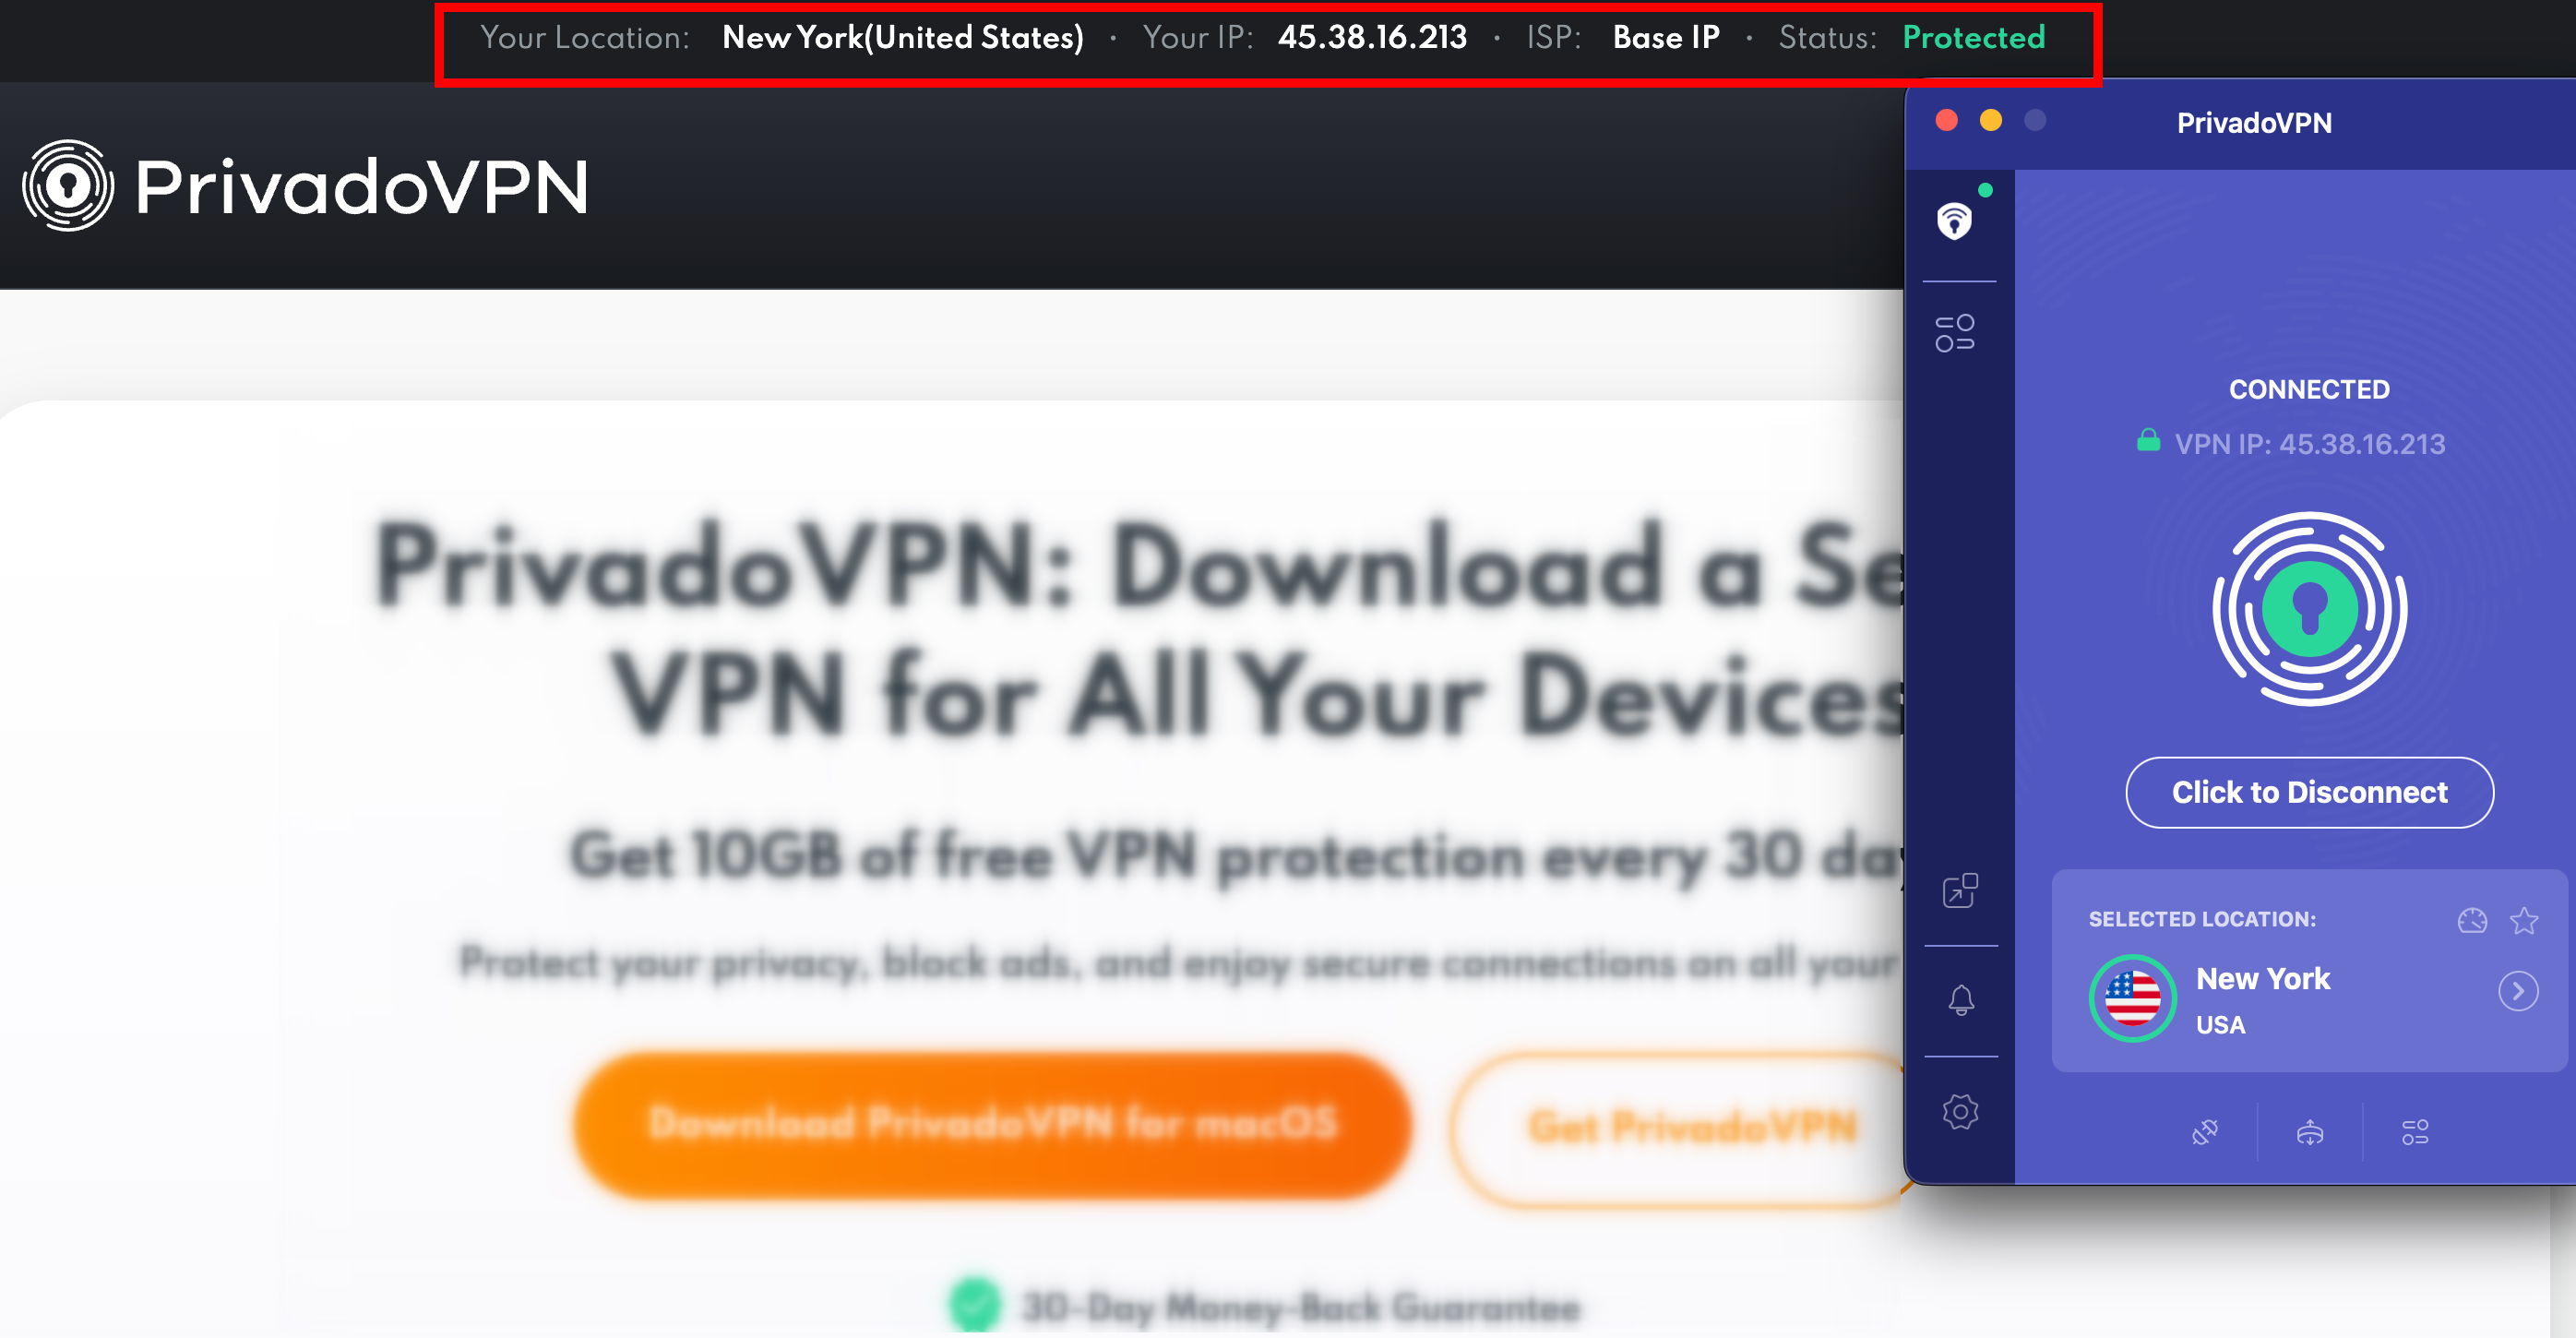
9. All done! You have successfully connected to a PrivadoVPN server.
• To double-check if your connection is successful, return to our website and verify your IP address on top of the page.
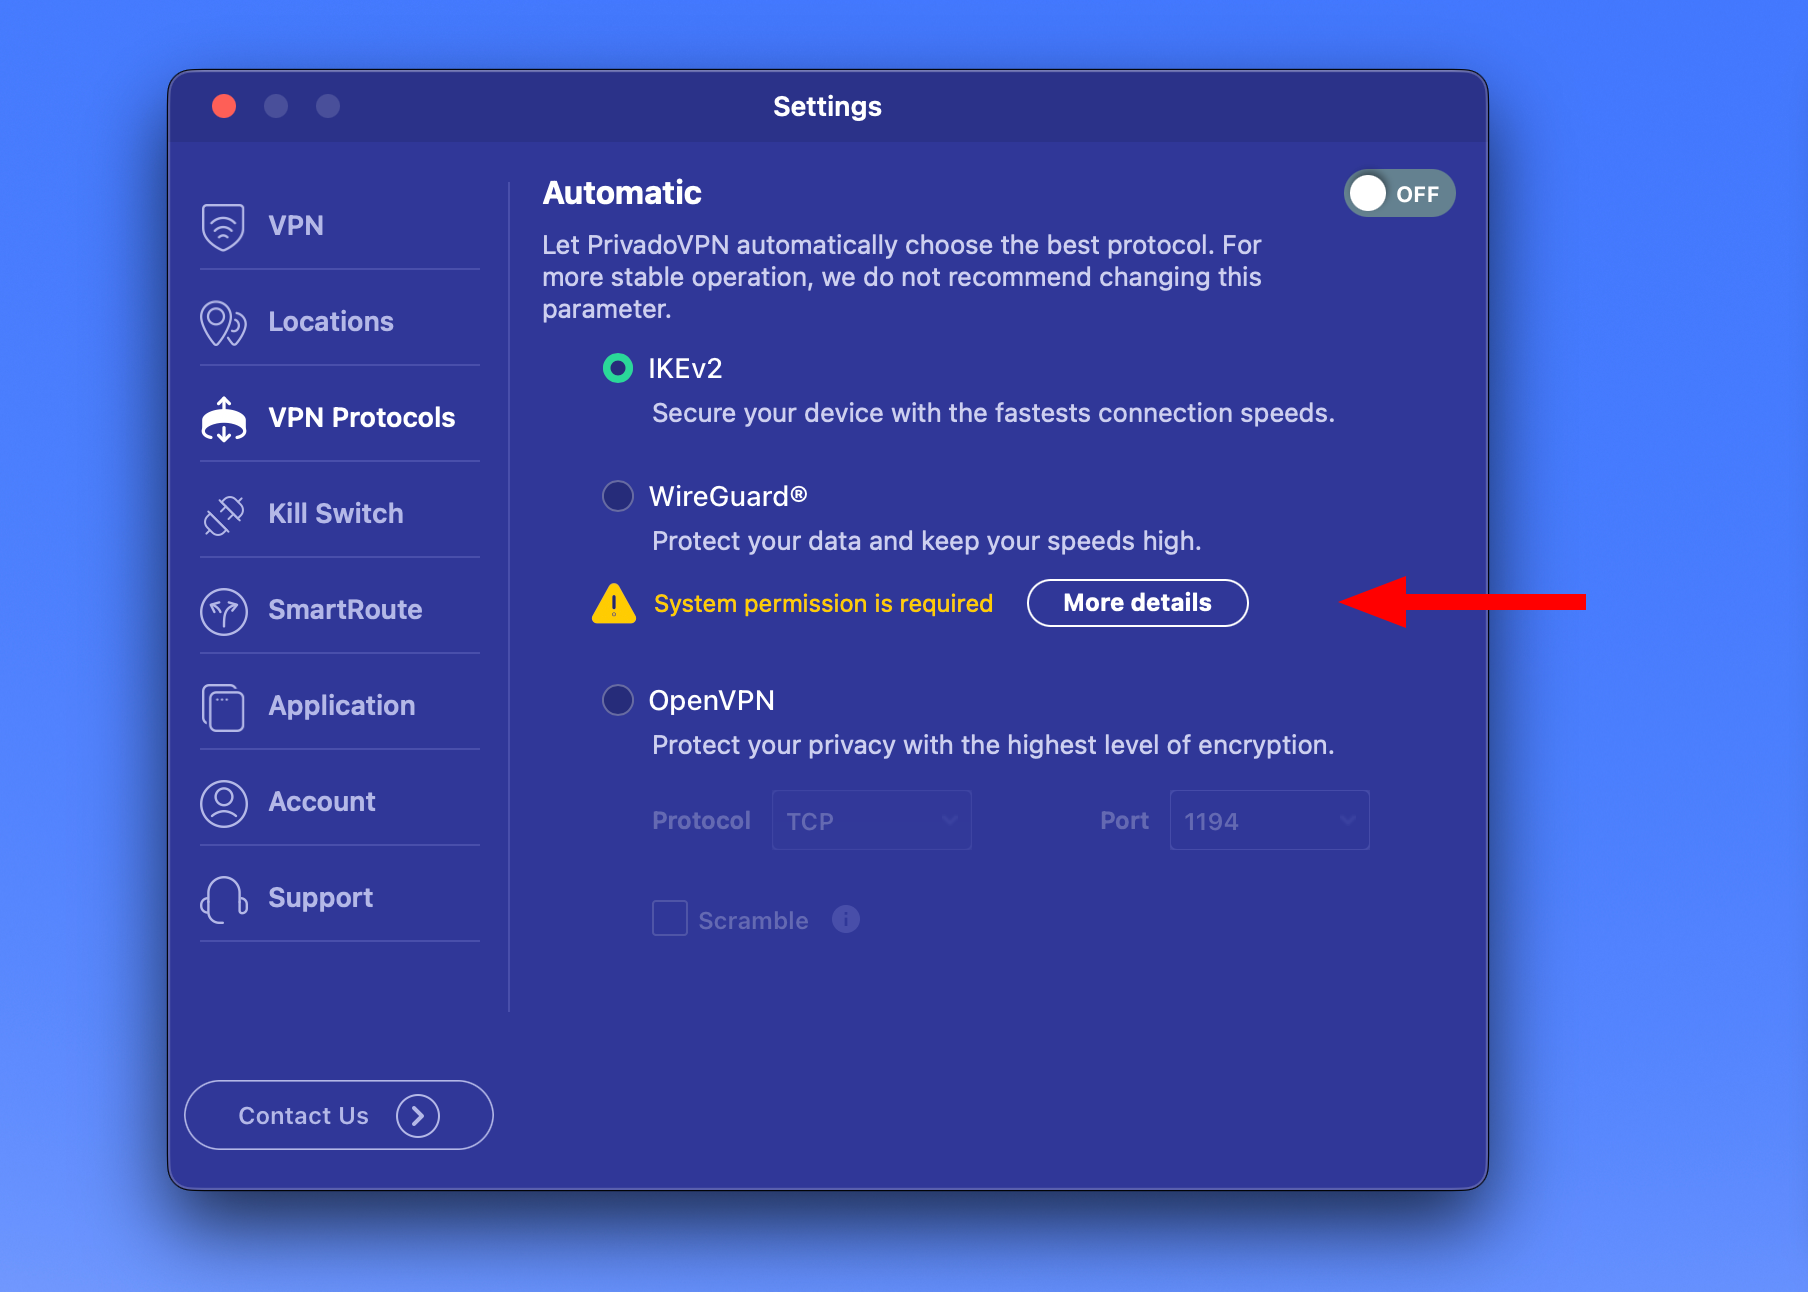
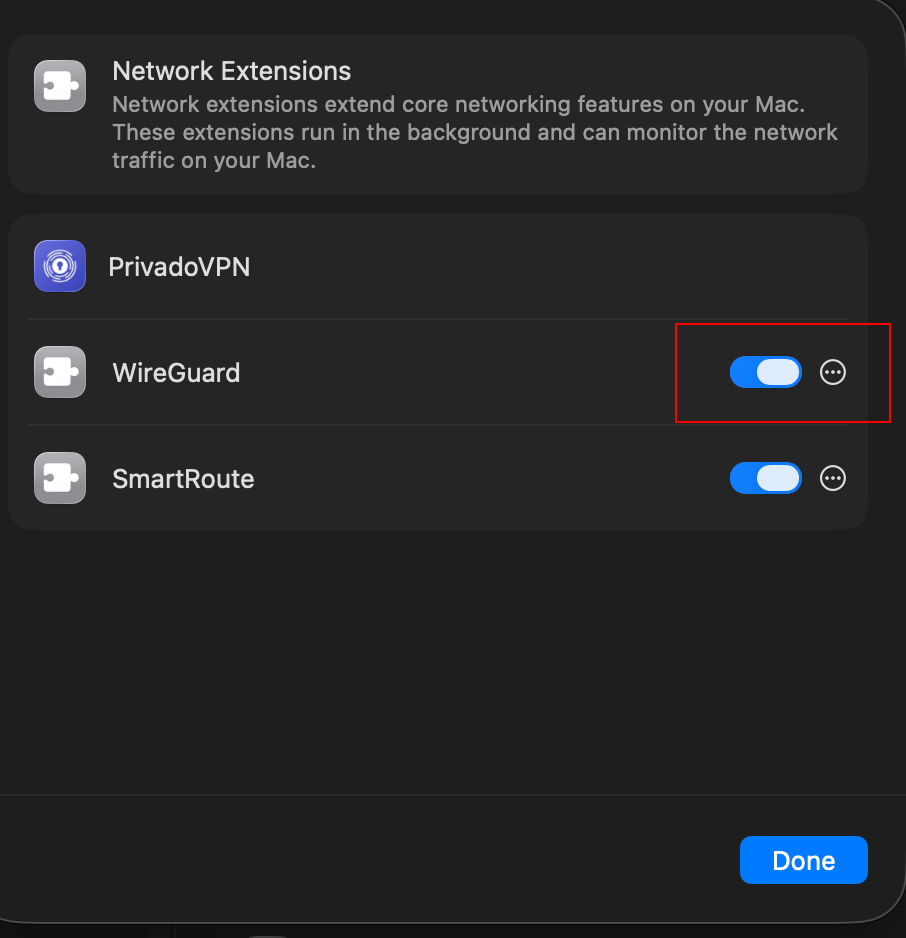
10. If you would like to use Wireguard or SmartRoute (Split Tunneling) feature, you may see a request for additional permissions:
• Open Mac Settings > General > Login Items and Extensions. Sort By Category.
• Scroll down to the bottom and find Network Extensions.
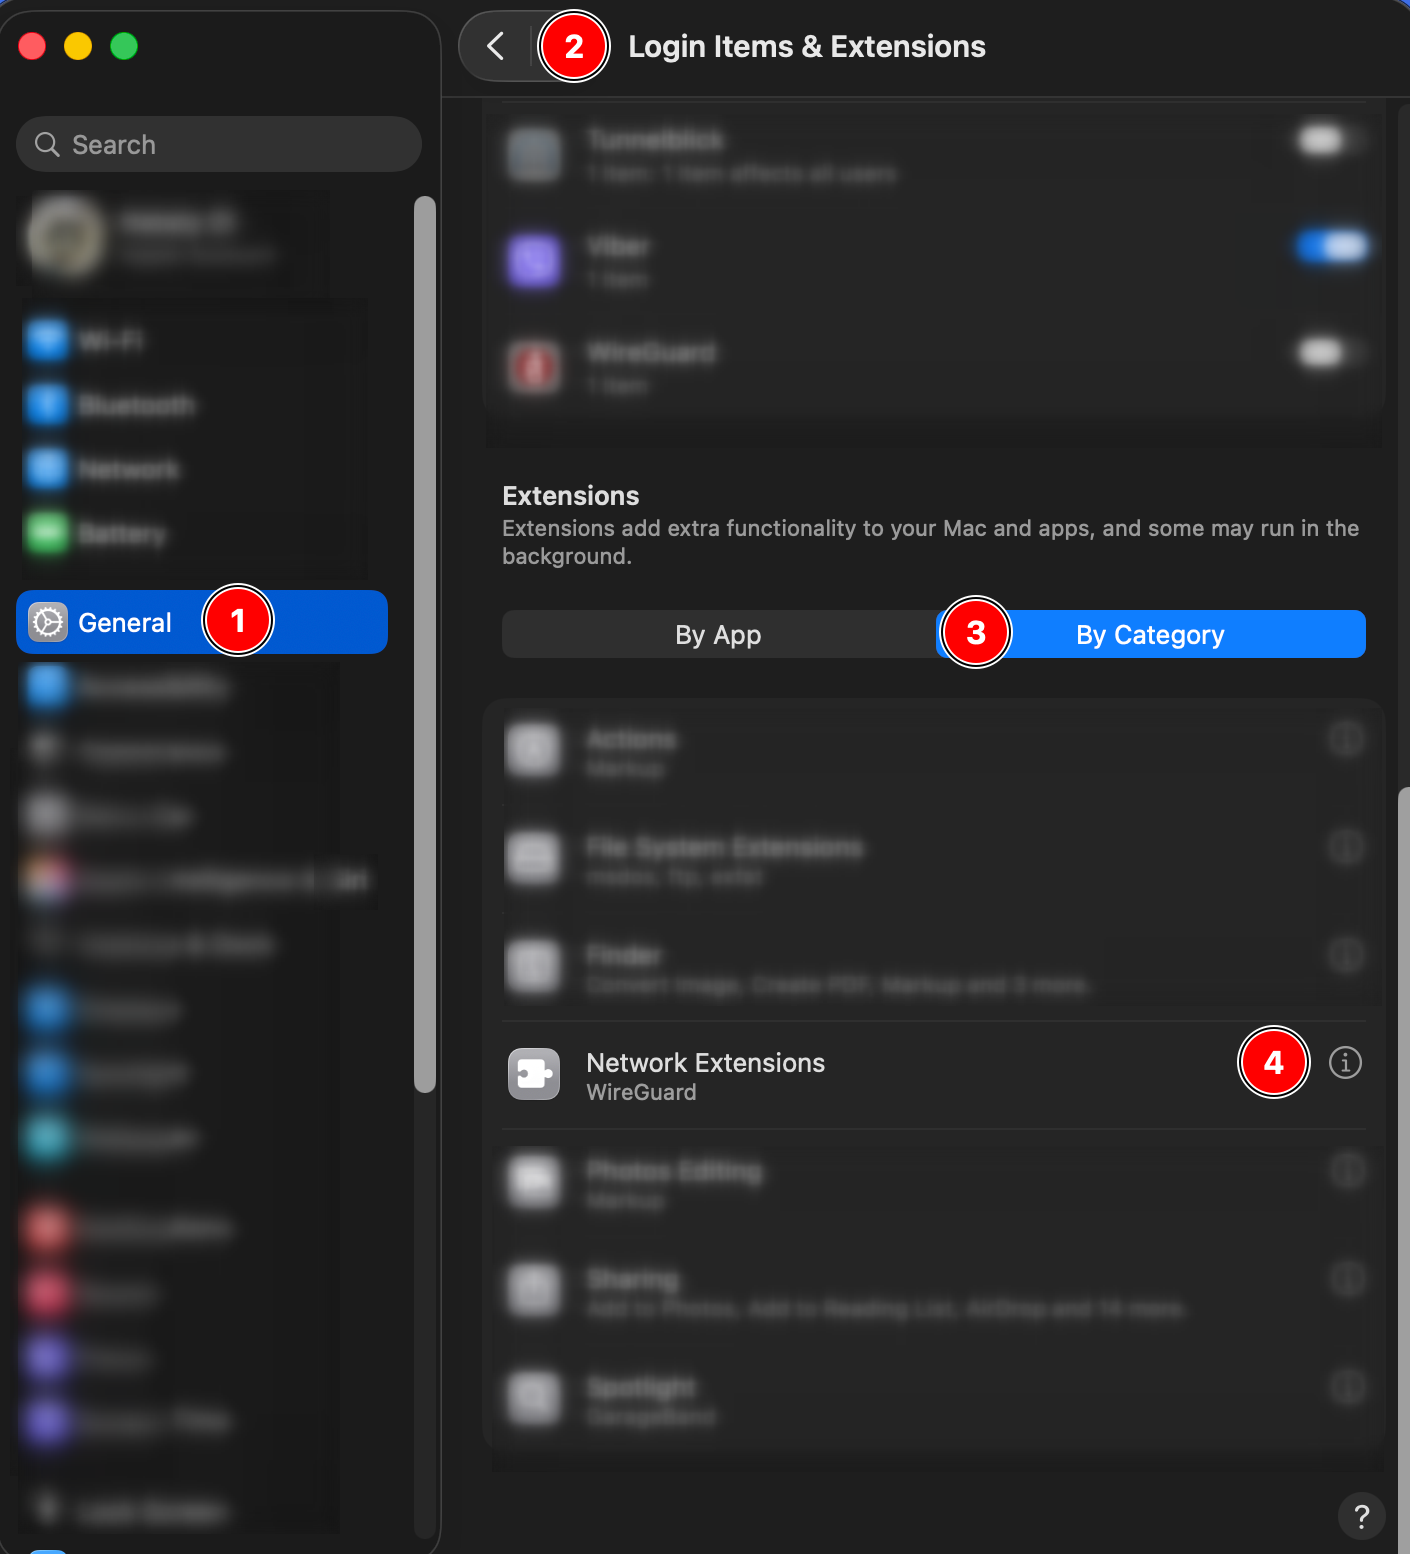
• Tap the “i” next to Network Extensions and enable Wireguard and SmartRoute under Privado. Click 'Done'.
*** You may need to enter your Mac password or use Touch ID.
Linked articles:
PrivadoVPN App for macOS. Features Overview
Need Help?
If you have any questions or need further assistance, visit our Support Form:

